Rapid MailMerge Documentation
Getting Started with Rapid MailMerge
First, you have to install the add-on.
Press the button below and it will take you to the Google Add-on listing.
Press the Free/Install button to install the add-on. Google will take you through the steps to complete the installation sequence.
Once the add-on is installed, it will be available in your Google Sheets Add-on menu.

Sending your First Campaign
Open the Google Sheet with that has the email addresses of your contacts.
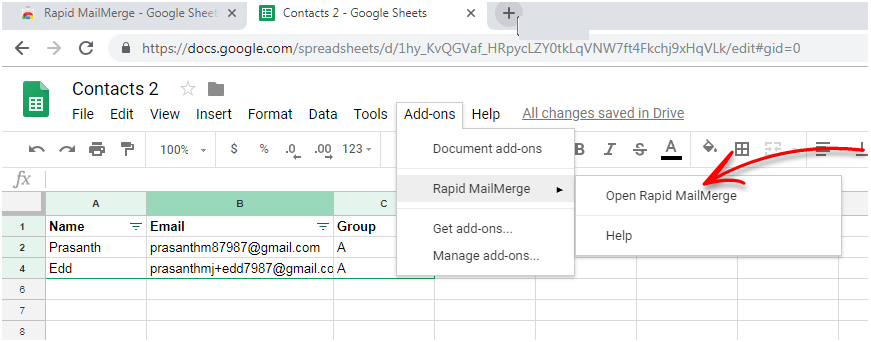
Open the menu item Add-ons -> Rapid MailMerge -> Open RapidMailMerge.
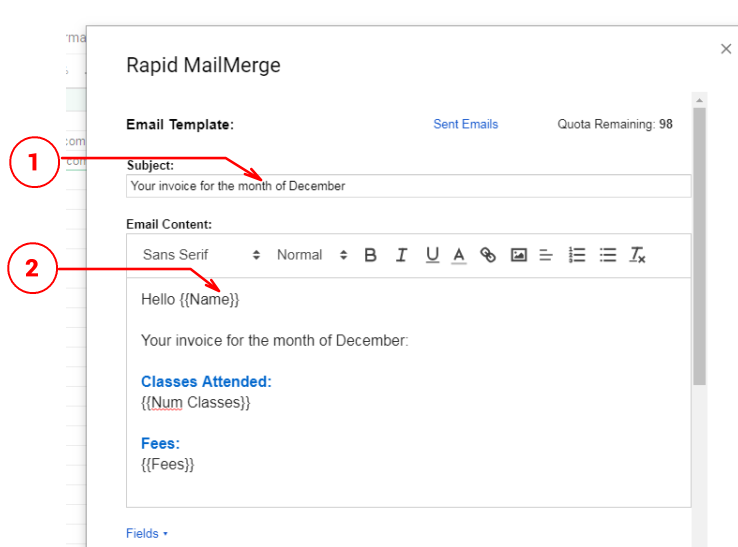
The Rapid MailMerge screen opens. You can directly compose your email.

Using the fields
1 & 2 shows how you can use fields from the Google Sheet in the email. The value of Name and Fees will replace {{Name}} and {{Fees}} while composing the email.
Click the 'Fields' link to open the list of fields box. Then you can easily copy & paste the fields to the email.

Make sure that the correct name and email field is selected in the 'To' field of the email. Rapid MailMerge will automatically select the best matching field from the sheet. But if the field name is different, you can correct the email field before proceeding to send the email.

Preview
After composing your email, press the 'Preview' button to see how the email will look like for the recipients.

Send the email!
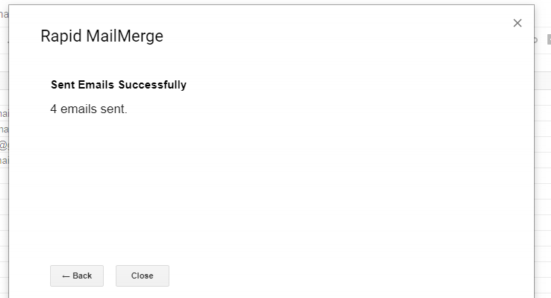
Once you have completed composing the email, press the 'send' button. Rapid MailMerge will start sending out the emails. It may take some time to complete the process depending on the number of contacts.
You may also want to check the email quota of the day. Gmail limits the number of emails you can send per day. Rapid MailMerge will show the quota for the day on top of the screen.

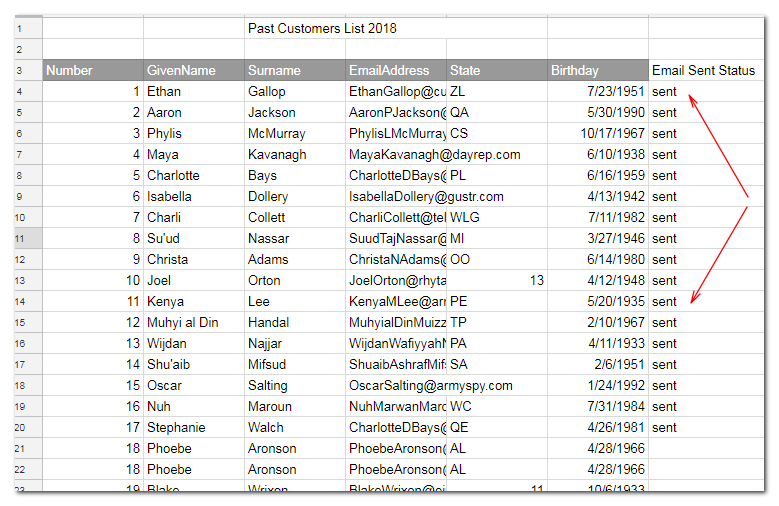
The add-on will add a column and add a "sent" mark to indicate the email was sent. email-sent-status

You can turn off this feature (updating the sheet when the email is sent) in the 'settings' page.